
How to Convert Figma to Webflow: A Step-by-Step Guide [2025]

Get weekly strategy insights by our best humans

Figma to Webflow conversion has reshaped how designers bring their visions to life on the web. Ever wondered how to turn those stunning Figma designs into fully functional websites without writing code? You're not alone!
Webflow stands out as a powerful, no-code platform that connects design and development seamlessly. Figma has become every designer's favorite tool because of its simplicity, collaboration features, and pixel-perfect designs. These two powerhouses together give you complete control over interactions, responsiveness, and animations—without writing a single line of code.
The process might be straightforward, but you'll need some time and planning. Great websites start with stellar designs, but moving them from Figma to Webflow can get tricky without proper planning. You can use the Figma to Webflow plugin for quick transfers or do a manual conversion. This piece will guide you through each step of the process.
Postdigitalist specializes in turning Figma designs into flawless Webflow websites. You can get a free, instant quote now if you'd rather have professionals handle it.
Want to learn how to bring your designs to life? Let's take a closer look at both platforms before we explore different conversion methods.
Understand the Tools: Figma and Webflow Basics
You need to know what Figma and Webflow do best before starting the conversion process. These tools have become the go-to standards in the industry, and with good reason too.
What makes Figma ideal for UI/UX design
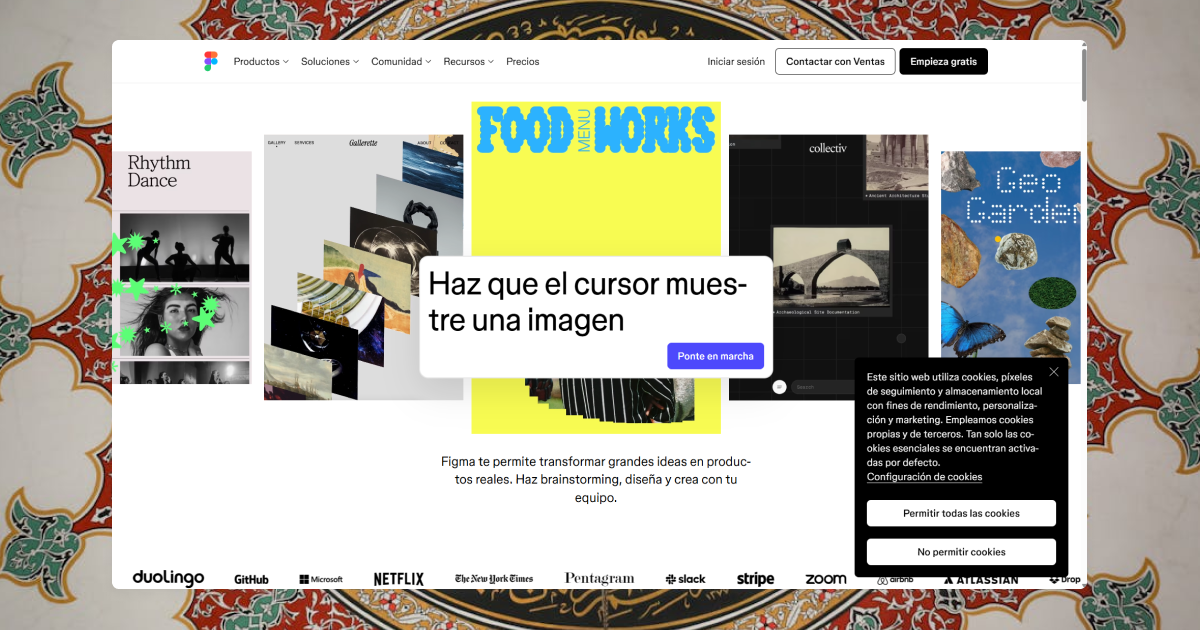
Figma has changed how teams approach collaborative design work as a cloud-based platform. Teams can now work on the same file at once, share feedback, and make edits in real time. This real-time collaboration helps teams work faster and get more done.
The platform works with vectors, which makes it great at creating interfaces that adapt to different screen sizes and resolutions. This makes it valuable when you design modern websites and apps that need to look good everywhere. Figma's accessible interface and powerful features let designers focus on being creative instead of fighting with complex software.
Figma really shines when it comes to prototyping. Designers can build interactive prototypes right in the tool without switching to something else. This saves time and makes the whole process smoother compared to tools that need extra plugins for prototyping.
Here are some key features that make Figma great for UI/UX design:
- Auto Layout feature that automatically adjusts elements within frames
- Smart Animate for creating smooth transitions and animations
- Design system management with reusable components and styles
- Version control that tracks changes and allows reverting to previous versions
Figma works in any browser on any operating system. You don't need expensive hardware or complex software installations to use it.
Why Webflow is perfect for no-code development
Webflow changes how we build websites by letting designers create professional, responsive sites without writing code. It connects design and development through a visual interface that creates clean, semantic code in the background.
The visual editor turns design choices into proper HTML, CSS, and JavaScript. Designers can now build complex websites while keeping full control of the final product. More people use Webflow to create blogs, eCommerce stores, portfolios, and business websites.
Webflow's content management system (CMS) lets users design, create, and update collections of content naturally. This works great for websites that need regular content updates. The platform includes reliable SEO tools that help manage metadata, alt text, and structured data while making images smaller and code more efficient.
Webflow's hosting service includes free SSL certificates to protect connections with site visitors. You won't need extra services or complex setups for security.
How they complement each other in workflow
Figma and Webflow work together perfectly from design to development. Teams use Figma for creative design and collaboration, then bring those designs to life on the web with Webflow.
To name just one example, designers create detailed mockups and prototypes in Figma first. Teams work together to refine these designs until they're approved. The new Figma to Webflow plugin makes moving designs to Webflow much easier. You can now turn Figma designs into clean HTML and CSS with just a few clicks.
The plugin converts auto layout frames from Figma into clean Webflow code. It can sync your design system quickly too. Your design system stays consistent because Figma components become reusable Webflow components, including variables for colors, typography, and spacing.
At Postdigitalist, we help teams get the most out of this Figma to Webflow process. We make sure your designs become pixel-perfect websites. You can get a free quote right now at postdigitalist.xyz/resources/webflow-pricing if you want experts to handle the technical work.
Method 1: Using the Figma to Webflow Plugin

The Figma to Webflow plugin acts as a direct bridge between design and development. This official Webflow tool changes static Figma designs into working Webflow projects efficiently.
Install and authorize the plugin
The setup process for the Figma to Webflow plugin needs a few simple steps:
- Launch Chrome or the Figma Desktop App (Safari doesn't support the plugin)
- Head to the Figma to Webflow plugin page and click "Try it out" in the upper right corner
- Click "Run" at the bottom when the plugin modal shows up
- Click "Next" then "Connect" to start authorization
- Pick the Webflow sites or workspaces you want to link and click "Authorize app"
- Go back to Figma and click "Get started" in the modal
- Pick your Webflow site from the dropdown menu to begin
The plugin's interface shows three main tabs after installation: Layers (for Figma element exports), Variables (for Figma variable exports), and Styles (for text and effect style exports).
Prepare your Figma file for export
Your Figma file needs specific preparation to get the best results. The plugin only works with Auto Layout frames. You can't work around this key requirement, so organizing your design with Auto Layout is crucial.
Here are some preparation tips that work well:
- Keep layers clean and organized with clear names
- Remove component links to avoid transfer problems
- Use Auto Layout throughout your design
- Add custom fonts to Webflow before starting the transfer
- Name elements correctly for proper HTML tag assignment
The plugin assigns HTML tags based on layer names automatically. Layer names like "button" become anchor tags, while "description," "text," or "paragraph" turn into paragraph tags, and "heading" becomes H1 tags.
Transfer and paste designs into Webflow
The design transfer process involves these key steps:
- Access the Layers tab in the plugin
- Pick one or more layers from your Figma file
- Click "Continue" and then "Sync to Webflow"
- Launch Webflow and click your latest sync
- Choose which components, elements, and variables to bring over
- Click "Import selected items" to finish
Pro designers usually sync a few components at a time instead of entire pages. This makes fixing issues easier and reduces problems.
These optimization steps help after importing:
- Fix class names created during transfer
- Check your design in Webflow's breakpoints
- Add any interactions and animations missing from Figma
- Adjust responsive behavior as needed
Limitations and when to avoid the plugin
The Figma to Webflow plugin has some key limitations:
- Needs Chrome or Figma Desktop App (Safari won't work)
- Works only with Auto Layout frames
- Can't move complex interactions or animations
- Might have trouble with custom designs or unusual layouts
- Sync conflicts can happen after Webflow changes
- Creates basic class names that need cleanup
Simple layouts and Auto Layout designs work best with this plugin. Complex or custom designs might need professional conversion services like Postdigitalist's. Our team turns Figma designs into flawless Webflow sites without automated tool limits. You can get a free quote right now.
The plugin's value depends on balancing time saved against cleanup work needed later. Many designers still find it helpful to speed up their Figma to Webflow workflow, despite its limits.
Method 2: Manual Conversion from Figma to Webflow
Manual conversion from Figma to Webflow gives you a unique experience with complete control over your design implementation. This approach takes more time than using plugins but lets you control how each element converts to functional code. Here's how to achieve pixel-perfect results step by step.
Clean and organize your Figma file
Your success starts with a well-prepared Figma file. The original focus should be on layer organization - name all layers clearly and group related elements logically. Making reusable components for headers, buttons, and icons will give a consistent design and make the Webflow build easier.
Check dimensions and line up spacing with uniform units to keep modular design principles. This detail-oriented approach builds responsive designs and creates solid foundations for your Webflow project. Just remember - good preparation leads to great results.
Export assets and fonts properly
The right asset export is vital for your site's visual quality. Follow these steps to get the best results:
- Export images at 2x resolution for retina displays (WebP format recommended)
- Download SVG icons via Figma's Export > SVG option
- Use PNG or SVG for illustrations and logos requiring transparency
- Opt for JPEG for photographic content without transparency needs
- Compress large images before uploading to Webflow using tools like TinyPNG
Custom fonts need direct uploads to Webflow's Fonts section in Project Settings. Set up matching font families, weights, and styles from your Figma design to keep typography consistent.
Recreate layouts using Webflow's visual tools
Webflow's layout tools match Figma's capabilities closely. Replace larger frames and groups from your Figma file with div blocks in Webflow first. This "div-framing" technique keeps your layout organized and makes future changes simple.
Sections that aren't full-width need containers within divs just like your Figma design shows. Add unique class names to each div on canvas. This helps maintain structure and makes styling easier.
The grid system works great for structured content like galleries. Flexbox suits layouts that need equal spacing or dynamic adjustments better. Use absolute positioning only when elements must overlap in fixed areas. Copy margin and padding values straight from Figma's inspect panel for exact spacing.
Match styles and interactions manually
Smart styling in Webflow needs strategic thinking. Generic classes work better than specific ones (use "All H1 Headings" + "Black Text" instead of "Black Hero Text"). This keeps your stylesheet clean and easy to manage.
Look at your Figma prototype's interactions and recreate them in Webflow's Interactions Panel. You can trigger animations through scroll, hover, click, or load events. Webflow excels at creating complex animations without code, even though Figma has limited interaction options.
Note that websites behave differently than static designs. You'll need to adjust during conversion. The goal isn't exact pixel matching but creating a functional, responsive site that captures your design's essence while using Webflow's powerful features effectively.
Optimize Your Webflow Project After Import
Your Figma design has made it to Webflow, but there's still work to be done. You'll need some final touches to make your website look perfect, work smoothly, and deliver exactly what you want. Let's look at how to turn your imported project into a polished, responsive website.
Clean up class names and structure
Webflow turns your Figma layers into classes, which often leads to naming issues. Each Figma layer name becomes a class during sync or copy to Webflow. You'll need to clean up this class structure to keep things manageable.
Start by checking your Style Manager panel to standardize class names. Replace vague names with ones that describe what they do rather than how they look. To name just one example, see "form-button" (good) versus "blue-button" (bad). This approach makes updates easier down the road.
Special characters don't work well in class names because Webflow changes them to hyphens. Both "your class name +" and "your class name $" end up as "your class name -". These changes can mess up your styles.
Here's how to organize your classes:
- Use global classes for common elements like buttons or typography
- Keep local classes for section-specific styling
- Don't overdo combo classes
- Use the "Clean Up" link in the Styles panel to remove unused classes
A well-organized class system will save you hours later, especially with bigger sites or team projects.
Test responsiveness across breakpoints
After cleaning up the structure, check how your design works on different screen sizes. Webflow uses these breakpoints:
- Tablet (991px to 767px)
- Mobile landscape (767px to 478px)
- Mobile portrait (478px to 0px)
Figma layers can stack vertically at specific breakpoints, but layers under 250px or those already stacked won't change. You can manually adjust responsiveness using Webflow's wrap and min/max width properties.
Use Webflow's device preview mode to see your site on different screens. Watch out for navigation menus, image sizes, and text readability. The grid system and flexbox settings will help you fix layout issues across devices.
Add animations and interactions
Of course, Figma can't match Webflow's animation capabilities. Now you can add engaging movements to your site.
The Interactions panel lets you create animations using triggers like:
- Mouse click (tap)
- Mouse hover
- Scroll into view
- Page load
- While scrolling in view
Simple effects work best. Subtle fade-ins, smooth movements, and well-timed animations create professional results without overwhelming your visitors. You can animate specific elements or entire classes for consistent effects throughout your site.
Check how your animations look on different devices. What looks great on desktop might be too much for mobile. You might want to add options to reduce motion for users who are sensitive to animations.
Upload and apply custom fonts
Custom fonts from your Figma design need uploading to Webflow first, or they'll disappear during sync. You'll find the upload option in Site Settings > Fonts > Custom Fonts.
Upload multiple font formats (WOFF, WOFF2, TTF) for better browser support. Webflow's Google Fonts integration works too, but downloading and uploading them as custom fonts helps with GDPR compliance.
Set up your fonts through the Typography section in the Style panel. Double-check that your font families, weights, and styles match your Figma design perfectly.
Moving from Figma to Webflow involves many technical details. Postdigitalist can handle these optimization steps for you if you need help. Get your free quote at postdigitalist.xyz/resources/webflow-pricing.
Best Practices for a Smooth Transition
Your Figma to Webflow projects need strategic planning and preparation to succeed. These best practices will help you move smoothly from design to development with minimal friction.
Use auto layout in Figma for better responsiveness
Auto Layout in Figma forms the foundation for responsive designs that merge naturally with Webflow. This feature matches Webflow's flexbox structure and creates a natural bridge between platforms. You should set up frames with min/max width properties and enable wrapping. This ensures your elements adapt well across different screen sizes. Designs built with Auto Layout frames will export as clean CSS in Webflow without much rework.
Use Webflow's prebuilt components
Webflow has many prebuilt components that speed up development time. These ready-made elements keep your site consistent and reduce manual work. Start with simple structures like navbars, hero sections, and footers. This lets you focus on customizing typography, colors, and images to match your design. Agencies can cut their project time in half with this approach.
Manage styles and classes efficiently
Good class management stops your site from getting slow with bloated code. Start by creating descriptive, reusable class names (e.g., "Button-Primary" instead of "Blue-Button"). Next, keep class definitions simple and specific. You can combine general classes with modifier classes for maximum flexibility. This organized approach will keep your Webflow project easy to maintain as it grows.
Compress images and optimize assets
Image optimization makes a big difference to your site's performance and user experience. You should export images at 2x resolution for retina displays using these formats:
- WebP: Best compression and quality (recommended first choice)
- SVG: Perfect for icons, logos, and vector graphics
- PNG: Great for transparent backgrounds when WebP isn't an option
- JPG: Works best for photographs without transparency
You can also use tools like TinyPNG to shrink file sizes without losing quality. Good file naming helps with organization and boosts SEO performance.
When to Use a Figma to Webflow Agency
Professional Figma to Webflow agencies transform complex design challenges into exceptional website experiences. Your project's complexity and team's capabilities will determine whether you should take the DIY route or hire experts.
Benefits of working with professionals
Professional agencies can speed up your development timeline substantially. You'll get a high-quality website at a fraction of the cost compared to traditional development methods. These economical solutions come from optimized workflows and systems that get better with each project.
Expert developers deliver pixel-perfect accuracy in design translation. They pay close attention to small design details that amateur developers might miss. Many agencies have specialized experience with both Figma and Webflow platforms. Some are 5 years old and will give a smooth transition between design and implementation.
When your project needs advanced customization
You need professional help when your project has:
- Complex animations and interactions requiring advanced expertise
- Multiple CMS features and dynamic content needs
- Third-party integrations and automations
- Strict technical requirements for performance and SEO
Simple projects (1-3 pages) cost between $2,500-$5,000, while complex projects are a big deal as it means that $10,000. Project timelines vary based on complexity. Simple projects take 2-4 weeks, while complex ones might need 2-3 months.
How Postdigitalist can help: Get a free quote
Postdigitalist specializes in flawless Figma to Webflow conversions. We start with a full picture of your design, set up Webflow properly, implement precisely, and test thoroughly before deployment.
Websites are a vital part of business success today. Professional conversion will ensure your site loads quickly, scales effectively, and converts visitors—whatever stunning Figma design you have. Get your free, instant quote today.
Key Takeaways
Converting Figma designs to Webflow doesn't have to be complicated. Whether you choose the Figma to Webflow plugin for quick transfers or take the manual route for complete control, both methods can deliver professional results with the right approach.
The plugin works great for straightforward projects with Auto Layout frames and saves valuable time. Manual conversion gives you precision and flexibility for complex designs with custom interactions and animations. Your choice depends on your project's complexity, timeline, and technical comfort level.
Success comes down to preparation and attention to detail. Clean, organized Figma files with proper Auto Layout setup will make your conversion smoother. Take time to optimize your Webflow project after import—clean up class names, test responsiveness, and add those finishing touches that bring your design to life.
Remember that these tools complement each other beautifully. Figma excels at collaborative design and prototyping, while Webflow transforms those visions into fast, responsive websites. Together, they create a powerful workflow that eliminates the traditional gap between design and development.
If you're feeling overwhelmed by the technical details or working on a complex project with tight deadlines, professional help is just a click away. Postdigitalist specializes in pixel-perfect Figma to Webflow conversions that capture every detail of your design vision. Get your free quote and let experts handle the technical work while you focus on what you do best.
Your stunning Figma designs deserve to shine on the web. With the right approach—and the right support when you need it—you can turn those designs into websites that look beautiful, perform flawlessly, and deliver real results for your business.